|
|
| Favorite Classics |
|
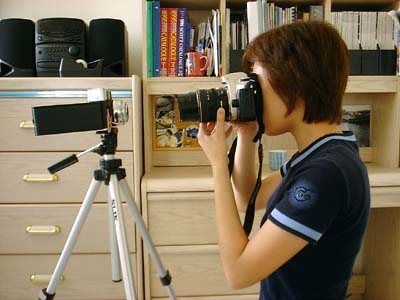
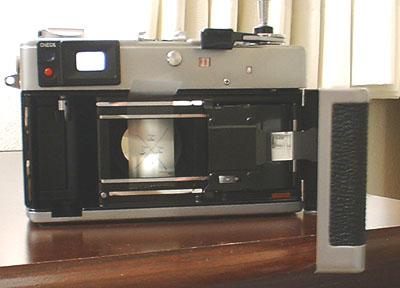
We’ll look at three ways to test a camera’s focus. As with most testing and test equipment, the more complicated and involved the equipment the easier it is to use. This doesn’t necessarily mean fancy test equipment is more accurate. Accuracy is mostly a function of the human tester. Take a lot of care while following a good technique and you’ll get good results regardless of the equipment. The theory here is making certain that when the lens is focused to infinity very distant objects are in focus on the focal plane AND in the viewfinder. The first method uses the least amount of equipment. In fact all that is needed is a piece of ground glass 35mm by about 60mm and a loupe. Matte finish tape can be substituted for the ground glass. But sticky tape can get very messy. Rubberband the ground glass on the focal plane with the ground side towards the lens (or apply the tape tightly to the focal plane). Mount the camera on a tripod. You may have to take it outside in order to focus on a very distant object. The brighter the light the better. Put shutter speed on T or use B and a locking cable release to hold the shutter open. Set lens to infinity and sight a distant object. The object should preferably be 300 feet plus away and have strong vertical and horizontal lines...like powerline poles. Distance will depend on lens focal length. 300 feet would be hard to see with a 30mm lens. Using the loupe check for sharp focus on the ground glass. Then similarly check focus in viewfinder. The shutter will have to be released on SLR’s to check viewfinder. The second method uses more equipment but, of course, gets easier to do. You’ll need a good focusing SLR with a telephoto lens (longer the better) as the testing lens. And you’ll need a 35mm by about 60mm piece of plain glass with an "X" scribed on it (or clear tape with a dark "X"). The preceeding ground glass can be used but the clear glass will be brighter. This technique is called "backsighting". I first read of it in Romney’s "Advanced Basic Training" but understand the technique is much older.
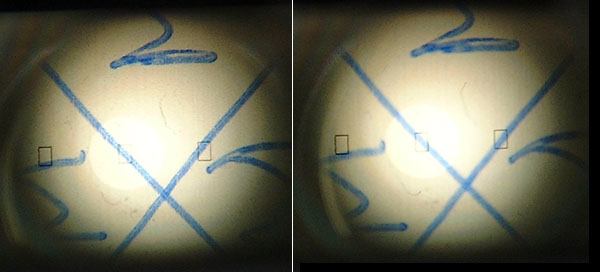
Mount camera to be "tested" on a tripod. Handhold the "tester" camera (the good focusing SLR with telephoto lens). Again open back and rubberband the glass to the focal plane with the scribed side toward the lens (or apply the marked tape to the focal plane). Again hold shutter open on T or B. Set focus to infinity on both cameras. Look through the SLR and through the test camera lens to the glass. In other words, looking through both lenses. The scribed "X" should be sharply in focus. The distance between cameras is not important.
Ok, go out and buy an expensive collimator...or... you can build one from some junk optics you may have laying around. You can use a telescope, binoculars or even an old camera and lens. I used a lens from a friends broken projection big screen TV... huge hunk of glass! But if I had to do it again (which I probably will some day) I wouldn’t make it from anything but an old SLR with a waistlevel finder. Anyway else is just flat too much trouble. Take a look at Mark Overton's method for building an auto-collimator. Tomosy in his first book shows a step by step way to make a collimator from one side of a pair of binoculars. I wasn’t lucky enough to have a broken pair of binoculars but was lucky enough to have Jim’s TV break right when I needed a lens! Anyway I’m not going to describe how to make one like mine...I’m not that saddistic. You can read Tomosy if you have a good half a binocular laying around. What I will describe is what I may do someday. Build one from an old Exakta. Why an Exakta? Because it will be cheap and EASY. An old Exakta body can be had very reasonably. And there are hundreds of telephoto lenses to be had cheaply for these bodies. The lens can be scratched, who cares. The shutter need not work. The mirror mechanism can be frozen. The camera back can even be missing. What needs to be good is the focal plane straight and square and the waistlevel finder bright and clear. I would first mount the lens and verify correct focus and take great pains in getting it very accurate. Shimming is relatively easy on an Exakta. Next I would replace the mirror with a two way mirror from an old Polaroid. Then mount a loupe in the viewfinder and a piece of plain glass with an etched grid pattern on the focal plane. Finally I’d take a handheld, battery operated slide viewer and fasten it over the focal plane. The camera to be tested only needs a thin front face mirror to be mounted where the film goes. (I said "where the film goes" because I got tired of typing focal plane.) And that is it... Easy. I know a Canon Pellix already has a "see-through" mirror but it doesn’t have a waistlevel finder and it is much pricier. In fact I have one. This is what gave me the idea. It is so easy to use as a makeshift collimator. All it needs is a permanent light and viewfinder magnification. |
 The
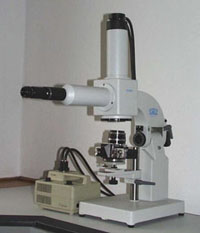
third method is to use a collimator. All a collimator does is project
light in a straight line and provide a means to "see" along
this straight line. This is basically what we were doing with the telephoto
lens in the above second method.
The
third method is to use a collimator. All a collimator does is project
light in a straight line and provide a means to "see" along
this straight line. This is basically what we were doing with the telephoto
lens in the above second method.