| Author |
Message |
    
Hank
Tinkerer
Username: Hank
Post Number: 3
Registered: 07-2011
Rating: N/A
Votes: 0 (Vote!) | | Posted on Tuesday, July 12, 2011 - 10:33 pm: | 


|
Hello I need a tool just like this one off ebay. It is used to unscrew the timer lever and rewind knob off a leica M3 http://cgi.ebay.com/Removers-4-Leica-M3-MP-SelfTimer-VF-Lever-Film-Rewinder-/180 527855305?pt=Film_Cameras&hash=item2a084c76c9
Please help me find one. I dont want to order the one off ebay cause that guys tools are not made well. Thanks, Henry |
Monopix
Tinkerer
Username: Monopix
Post Number: 216
Registered: 11-2008
Rating: N/A
Votes: 0 (Vote!) | | Posted on Wednesday, July 13, 2011 - 07:41 am: |
|
Isn't it just a regular pin faced screw? In which case, a regular wrench with pointed tips will do it. Try Microtools.
http://www.micro-tools.com/store/~/C-SPN/Spanner-WrenchsLens-Tools.aspx |
Hank
Tinkerer
Username: Hank
Post Number: 4
Registered: 07-2011
Rating: N/A
Votes: 0 (Vote!) | | Posted on Wednesday, July 13, 2011 - 10:41 am: |
|
Yes a spanner works but sometimes they slip and scratch the head of the screw, I like the way that other tool looks. Im assuming its a cleaner easier way to work with thoses particular screws. Plus Im a tool freak. I love having a tool for everything. |
Monopix
Tinkerer
Username: Monopix
Post Number: 217
Registered: 11-2008
Rating: N/A
Votes: 0 (Vote!) | | Posted on Wednesday, July 13, 2011 - 01:49 pm: |
|
Microtools also do similar spanners with ends with fixed spacing of the tips. They have a complete set available - but at nearly $200 I'd rather buy an adjustable.
http://www.micro-tools.com/store/P-R257/Minispan-Wrench-Set-w-16-Tips.aspx |
Hank
Tinkerer
Username: Hank
Post Number: 5
Registered: 07-2011
Rating: N/A
Votes: 0 (Vote!) | | Posted on Wednesday, July 13, 2011 - 05:46 pm: |
|
Thats amazing. That is basically what im looking for. but man it expensive !!! Thanks Monopix. Funny part is I also contacted Micro-tools and they said they had nothing comparible. |
Glenn
Tinkerer
Username: Glenn
Post Number: 940
Registered: 07-2006
Rating: N/A
Votes: 0 (Vote!) | | Posted on Thursday, July 14, 2011 - 06:21 am: |
|
Unfortunately Micro-tools were correct in their reply to you, this tool is not directly comparable with the original Leitz tool. The original tool has round pins that fit snugly in the face holes, but the Micro-tool set has 'pins' that are of square section and these can soon 'bruise up' the holes in screws that are initially rather tight. Our Chinese friend on eBay may not produce a tool that has the finish of the original, but it certainly will not mar the surface finish of the screw face - the couple of tools I has seen from this source were quite reasonable for the price and were adequate DIY tools. |
Hank
Tinkerer
Username: Hank
Post Number: 6
Registered: 07-2011
Rating: N/A
Votes: 0 (Vote!) | | Posted on Thursday, July 14, 2011 - 10:28 am: |
|
Your right Glenn. I can see how those square tips could damage the head. Especially a stubborn head. I appreciate you pointing that out. I ordered the tool from Zhou. Wouldnt it be sweet if Leica sold a tool kit? Only in my dreams. Thanks again. Henry |
Cooltouch
Tinkerer
Username: Cooltouch
Post Number: 132
Registered: 01-2009
Rating: N/A
Votes: 0 (Vote!) | | Posted on Thursday, July 14, 2011 - 10:26 pm: |
|
Guys, about 20 years ago -- more actually -- I made myself a small tool, actually at my camera repair instructor's recommendation. It's a small set of smooth-jawed sort of stubby needle nose pliers, a bit less than 5" long. Mine are made by Channellock, but I just visited their website, and it looks as if they don't make this little tool anymore. Well, I'm sure somebody makes something similar. Basically, all I did was grind the very tips of the jaws into two very small round but tapered pins about 1mm long. The tips are small enough to fit the pin-faces screws you might find holding a shutter speed dial or maybe a self-timer in place, and because they're tapered, they'll still fit snuggly into a pin-faced screw of the size usually found that hold the film wind crank assembly in place.
Because of the angle that occurs when the jaws are opened, they are really only practical to use at a pin-to-pin distance of about 3/4 inch. But I don't recall ever running into a pin-faced screw that has pin holes farther apart than that anyway.
With chrome surfaces, this little pair of pliers makes no marks. With black surfaces it sometimes makes slight marks, but I've found that if I tape over the pin holes with masking tape before inserting the plier tips into the holes, this will protect the black enamel.
This has become one of my most used tools when I have to dismantle or re-assemble a camera. |
M_currie
Tinkerer
Username: M_currie
Post Number: 265
Registered: 07-2006
Rating: N/A
Votes: 0 (Vote!) | | Posted on Friday, July 15, 2011 - 09:03 am: |
|
If you're handy with a file, or a Dremel tool, or (ideally) if you have the ability to do small machining, you can make a pin spanner from a wrench socket. I've done this a couple of times, most recently to make a spanner similar to what's needed here for the shift knob on a Nikon PC lens. Basically, what you do is file/mill/grind away all of the top part of a socket except for the two pins. Relatively cheap Asian sockets are usually tough enough to work for this, but soft enough to be workable. Whenever I can find them free or nearly so, I pick up cheap sockets and throw them in a bucket in the shop, for such purposes.
Not sure if it will show up, but I'm trying to attach a poor picture of what I mean....
Sorry, the site is bogging down, no attachment, it seems, today. Anyway, if you can find the right initial size of socket, in this case probably a small 1/4 inch drive one, you can make a dedicated pin spanner that will put a good deal of torque on a nut without hopping out and scratching things. |
Donnie_strickland
Tinkerer
Username: Donnie_strickland
Post Number: 126
Registered: 09-2006
Rating: N/A
Votes: 0 (Vote!) | | Posted on Friday, July 15, 2011 - 10:35 am: |
|
Rick Oleson has made and used these as well (see the lower left corner of the picture):
http://rick_oleson.tripod.com/basic_tool_kit.jpg |
Cooltouch
Tinkerer
Username: Cooltouch
Post Number: 133
Registered: 01-2009
Rating: N/A
Votes: 0 (Vote!) | | Posted on Friday, July 15, 2011 - 04:03 pm: |
|
Nice to see I'm not the only one who grinds down pliers for pin-face wrenches  |
M_currie
Tinkerer
Username: M_currie
Post Number: 266
Registered: 07-2006
Rating: N/A
Votes: 0 (Vote!) | | Posted on Friday, July 15, 2011 - 09:09 pm: |
|
Reground pliers and the like usually work fine for me, and for larger holes I also have a couple of pin spanners made for bicycles, which are very handy. Check out the Park Tool rack next time you're in a bike shop.
IN the case of my Nikkor PC lens, the knob was on very tight, and I could not get anything to stay in the holes without endangering either the holes, the whole lens, or my hands. Hence the socket spanner, which allows you to bear straight down. It looks as if the attachments are working tonight.....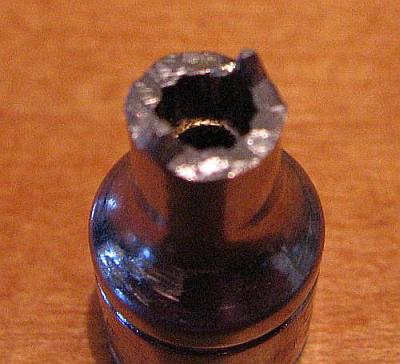 |
Ron_g
Tinkerer
Username: Ron_g
Post Number: 81
Registered: 07-2009
Rating: N/A
Votes: 0 (Vote!) | | Posted on Saturday, July 16, 2011 - 03:38 am: |
|
I made one out of black iron pipe which I turned down on my lathe after boring it out to the proper inside diameter then filing the ends,actually used the Craftsman version of the Dremel tool to get the ears shaped.
I needed it to remove the ring that holds the film winder etc on a Voigtlander Bessamatic.
It worked fine but the walls were so thin that the base metal of the pipe was not strong enough to prevent the ears from bending and then breaking off after a couple of uses.
I will make another someday out of better stock.I actually made one from a brass fitting with the same results.Ron G |
T6nn
Tinkerer
Username: T6nn
Post Number: 20
Registered: 06-2009
Rating: N/A
Votes: 0 (Vote!) | | Posted on Saturday, July 16, 2011 - 12:02 pm: |
|
BTW, one doesn't need to remove the self-timer lever before taking the shell off from an M3.
For the frame preview lever of my M4 a "rubber screwdriver" was all I needed. It pays off to at least try it first as it's arguably the most scratchproof of these tools. |
M_currie
Tinkerer
Username: M_currie
Post Number: 267
Registered: 07-2006
Rating: N/A
Votes: 0 (Vote!) | | Posted on Saturday, July 16, 2011 - 05:18 pm: |
|
Ron, believe me, cheap Asian sockets are da bomb for this job. Way tougher than iron pipe or brass, but still machinable. Can turn with HSS on a lathe, like butter with carbide. I keep a bucket of them around in a variety of sizes, for spanners, weld-on drive elements for things like munged up drain plugs, brake piston retractors, etc. |
Ron_g
Tinkerer
Username: Ron_g
Post Number: 82
Registered: 07-2009
Rating: N/A
Votes: 0 (Vote!) | | Posted on Sunday, July 17, 2011 - 03:10 am: |
|
I have such an aversion to cheap tools that I don't keep any of that stuff around.All you need is to ruin something because a tool broke/slipped and it is something that you will never forget.
However,I have been known to use such stuff for "loaners"....lol.
Since the tools that I made did not work because of inferior metals I can see that even the cheapest asian products must be better than what I have been using so I take this as good advice and will be using my "loaner" tools as machine stock from now on.I have learned something today,thank you.Ron G |
Hank
Tinkerer
Username: Hank
Post Number: 7
Registered: 07-2011
Rating: N/A
Votes: 0 (Vote!) | | Posted on Sunday, July 17, 2011 - 07:14 am: |
|
Im really learning alot on this post. Thanks to you all. This really is the best forum to get trade secrets. So I broke out the propane torch and an old pair of needle nose pliers and went to town. Man to get it red took FOREVER . Then trying to bend them was not so easy either. Then trying to bend the tip back up was challenging as well. I need to try again or re-do this one. Total train wreck !!! But it was fun. LOL  |
Denny
Tinkerer
Username: Denny
Post Number: 71
Registered: 08-2009
Rating: N/A
Votes: 0 (Vote!) | | Posted on Sunday, July 17, 2011 - 05:34 pm: |
|
FWIW - I have made "spanners" by bending a nail into a "U" shape and sharpening the points with a grinder or file or Dremel tool.
I hold it with a needle nose pliers with rubber bands on the nose to help hold the pliers closed. |
Mattboston
Tinkerer
Username: Mattboston
Post Number: 25
Registered: 01-2009
Rating: N/A
Votes: 0 (Vote!) | | Posted on Sunday, July 17, 2011 - 06:03 pm: |
|
Hi Hank,
Love the modified pliers- but some notes on steel hardness that you may already know:
If you heated those pliers up to red, then let them cool down at room temperature, you have effectively annealed the steel and made it as soft as can be.
To harden them, re-heat them to red (the tips) and as soon as you see red, dunk them into a bucket of water while sloshing it around- you want to cool them asap. Now they are are hard, and brittle as can be. Once cooled in the water (or oil), re-heat with the torch- and as soon as the tips turn blue, quench them in water or oil. Now you have heat-hardened tool steel.
Don't apply the flame directly to the tips, you need to watch the color change there, hit it a bit lower and you will be able to see the change- and polish up the tips after each stage- this will remove soot and other marks which can make seeing the color change difficult.
Good luck, I love seeing homemade tools.
Matt |
Hank
Tinkerer
Username: Hank
Post Number: 12
Registered: 07-2011
Rating: N/A
Votes: 0 (Vote!) | | Posted on Sunday, July 17, 2011 - 09:59 pm: |
|
Matt your awesome. Cant wait to fire up tomorrow. Cheers, Henry |
Chaspics
Tinkerer
Username: Chaspics
Post Number: 2
Registered: 07-2010
Rating: N/A
Votes: 0 (Vote!) | | Posted on Thursday, July 21, 2011 - 06:38 pm: |
|
Years back (and now still), I've solved a lot of these spanner-wrench problems by filing a cheap flat/slot-head screwdriver. No Dremel of machining experience required. Rough it out with a large file, and then finish the job with a simple jeweler's file from a hobby store. Matt's posting about proper hardening is an excellent and simple touch to really make it last. I must have a dozen of these custom spanners, and it's much easier than machining sockets if you don't have that kind of experience.
Chas |
M_currie
Tinkerer
Username: M_currie
Post Number: 268
Registered: 07-2006
Rating: N/A
Votes: 0 (Vote!) | | Posted on Tuesday, July 26, 2011 - 07:41 am: |
|
Grinding and filing a screwdriver works very well within the limited size range of the screwdrivers you have on hand, unless the nut in question is on extremely tight. For example, I could easily have made a spanner for the Nikon nut with a screwdriver, but it was so tight I had to bear down hard on it, and for this a wrench socket worked better, because it sits flat on the nut and is less likely to cam out. For most ordinary situations, a ground-out screwdriver is a quick and effective tool, and worth trying first. |