| Author |
Message |
    
Drhfuhruhurr
Tinkerer
Username: Drhfuhruhurr
Post Number: 3
Registered: 02-2009
Rating: N/A
Votes: 0 (Vote!) | | Posted on Tuesday, October 23, 2012 - 12:39 pm: | 


|
Hello. I wonder if anyone can offer some advice...
I recently pulled a non-working Yashica MG-1 out of "storage" (ok, it was a drawer..) and after some exploratory surgery it transpires that the shutter is not cocking fully when winding-on.
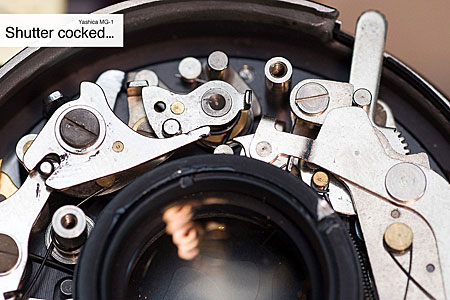
I've stripped the lens back so the shutter mechanism is exposed and can see that the main lever in the mechanism is not quite pushing the Blade-Closing Lever as far as it needs to go, which in turn is not pushing the Intermediate Blade-Closing Lever into the Blade-Closing Latch.
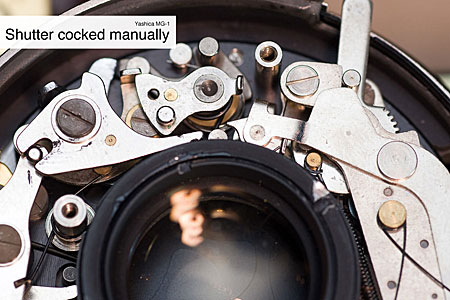
If I manually cock the shutter and push the release it will fire (at 1/500sec I believe) but when the shutter is cocked using the wind-on lever stroke, it doesn't quite manage to push the main lever all the way before the wind-on lever locks. When the shutter release is then depressed, the shutter does not fire.
I've attached two images showing the shutter cocked-with-wind-on-lever, and cocked manually to show the slight differences.
Re: lever names used above. I'm referring to those used here: http://www.erikfiss.com/foto/cams/electro35/Yashica_Electro_35_Repair_Manual/slides/44.html
So my question - is something out of whack or/and can some adjustment be made?
Many thanks,
Tom.
  |
Thepurush
Tinkerer
Username: Thepurush
Post Number: 63
Registered: 01-2012
Rating: N/A
Votes: 0 (Vote!) | | Posted on Thursday, October 25, 2012 - 11:58 pm: |
|
Yes, the solution is simple.
Go to page 90 and see main lever shaft that actually cocks the shutter. There is a tube that goes over this which has an integral gear wheel. This gear wheel is driven by a rack attached to the wind lever which slides when u cock shuuter.
The relative position of this gear and rack is the one that is disturbed. This might have jumped one tooth when cocked shuter and released the lever in a snap rather than by thumb.
For this you may hve to remove 2 screws that hold the rack in position. Then adjust the pinion gear posiion. Look at the main lever shaft(page90) position when shutter is released, turn it by hand clock wise just enough to take up play and note the popsition of the cross pin. The slot in the tube-with gear shld now match this if this has to fully cock shutter when wound. This means turning the tube anticlockwise by one tooth relative to the rack. It shouldnt get dislocated in normal use unless dismantled.
Good luck. |
Drhfuhruhurr
Tinkerer
Username: Drhfuhruhurr
Post Number: 4
Registered: 02-2009
Rating: N/A
Votes: 0 (Vote!) | | Posted on Friday, October 26, 2012 - 12:50 pm: |
|
Thank you, your instructions were spot on and the shutter is now cocking when winding-on and firing as it should at its mechanical (1/500sec) speed. I can�t tell you how long I�d been trying to solve the problem myself!
It had either jumped a tooth or someone has had the gear/rack apart previously. I have my suspicions it may be the latter as there�s certainly evidence elsewhere of previous attempts to �fix� things. Next on the list it to replace some poorly soldered battery wires and see if anything electronic on it works...
Once again, many thanks! |
|