| Author |
Message |
    
Aerowoof
Tinkerer
Username: Aerowoof
Post Number: 29
Registered: 02-2009
Rating: N/A
Votes: 0 (Vote!) | | Posted on Monday, January 07, 2013 - 12:13 pm: | 


|
blades are wide open on this lens and turning aperture ring makes no difference or when pushing or pulling on the automatic lever.any suggestions what may be wrong and how to proceed.looks like I go in from the rear/mount area. |
Br1078lum
Tinkerer
Username: Br1078lum
Post Number: 454
Registered: 11-2010
Rating: N/A
Votes: 0 (Vote!) | | Posted on Monday, January 07, 2013 - 09:20 pm: |
|
I just happen to have one of these in the middle of a teardown/clean-up. The previous owner put about a quart of oil in the lens trying to free up the sticky aperture. Most likely a severe version of what is wrong with your copy.
Four screws hold the back shroud on, then four more hold the mount ring. Put a very small drop of acetone or MEK on each screw to loosen any glue (but no more, or it will eat anything plastic it gets around). Still may take a bit of torque to break them loose.
There is a ring retainer screwed onto the rear elements to hold them in. It comes off Counter-Clockwise. Then the rearmost element will drop out (convex to the outside). The inner group of two cemented elements are press fit, and will take a bit of work to get them out. I used a jar lid opener to remove mine, rotating and pulling up at the same time. Very tight fit.
There is a copper colored snap ring situated in the rear of the barrel, and this needs to come out. Then the auto-aperture pusher ring will come out. That's all from the back side for now.
From the front, remove the name/filter ring with the jar opener gripping the outside of the ring, turning counter-clockwise. Next is a cone shaped retainer ring for the front element group. You need a round gripper, like a drain stopper of the proper diameter (or like I did, a plastic jar lid with a piece of grip pad like they make for the bottom of kitchen drawers to keep utensil bays from sliding around), to unscrew this retainer. The front element group is also press fit, and since there is no way to grip it, I pushed it out from the rear using a small piece of the rubber matting to cover the rearward facing element, and then pushing it out with a wooden dowel rod. You could also use a piece of lens cleaning paper folded over a few times for cushioning. Just make sure the front element doesn't land on anything other than a sheet of the lens paper.
Returning to the rear of the lens, unhook the spring from the screw-post. Remove the screw-post. Unscrew the retainer from the blocking cam, and then lift out the cam. The aperture actuating ring will now lift out, and the aperture is now dis-engaged.
Return to the front, and notice the three screws holding the aperture cover plate. Remove those, and the plate will lift out.
The aperture blades are now totally exposed, and will lift out as a unit by grabbing the tab, and pulling straight up. You can now clean each blade (I recommend Ronsonal lighter fluid, but you can also use Naptha), and every other part as you put it all back together in the oposite order of disassembly.
As for any lubrication that may be needed, I would use small amounts of a good synthetic lubricant, such as Super Lube, available from http://www.micro-tools.com/store/home.aspx , or your friendly neighborhood hardware store, as I found out. But check what Micro-Tools has so that you know what to look for. I'm going to kind of wing it, as there was so much oil on everything, I will have to take swabs to locate any spots where actual grease is supposed to be. You shouldn't have that problem, as it's just a matter of the factory lube migrating a bit due to storage conditions of the lens. Just make sure the blades are clean, and dry when you reassemble them, and there should be no problems.
Good Luck!
PF |
Aerowoof
Tinkerer
Username: Aerowoof
Post Number: 30
Registered: 02-2009
Rating: N/A
Votes: 0 (Vote!) | | Posted on Tuesday, January 08, 2013 - 10:35 am: |
|
thanks,is the teardown of this lens close to the lens you made the clock from as those pictures were helpful |
G3bill
Tinkerer
Username: G3bill
Post Number: 43
Registered: 12-2012
Rating: N/A
Votes: 0 (Vote!) | | Posted on Tuesday, January 08, 2013 - 03:37 pm: |
|
I was told to make sure theres no streaks on the blades when the naphtha is dried. I had to re clean the aperture blades at least 6X to get rid of the oil film on my 50mm Canon lens so it would not stick. I learned the hard way by taking the lens apart 3X to remove and clean blades , Rick helped get my mind straight , Rick helped get my mind straight . Amazing how that oil travels and bonds. . Amazing how that oil travels and bonds. |
Br1078lum
Tinkerer
Username: Br1078lum
Post Number: 455
Registered: 11-2010
Rating: N/A
Votes: 0 (Vote!) | | Posted on Tuesday, January 08, 2013 - 09:09 pm: |
|
Yes, no streaks on the blades. They have to be very clean. The construction of the ML lens is a bit simpler than the DSB, Aerowoof. On the ML, instead of two pieces holding the the front element group in, there is only one, and the element groups are not press-fit.
PF |
Br1078lum
Tinkerer
Username: Br1078lum
Post Number: 456
Registered: 11-2010
Rating: N/A
Votes: 0 (Vote!) | | Posted on Wednesday, January 09, 2013 - 11:31 am: |
|
I've posted the photos of the teardown on Flickr at http://flic.kr/s/aHsjDyepjE
PF |
Aerowoof
Tinkerer
Username: Aerowoof
Post Number: 31
Registered: 02-2009
Rating: N/A
Votes: 0 (Vote!) | | Posted on Wednesday, January 09, 2013 - 04:47 pm: |
|
thank you |
Aerowoof
Tinkerer
Username: Aerowoof
Post Number: 32
Registered: 02-2009
Rating: N/A
Votes: 0 (Vote!) | | Posted on Thursday, January 10, 2013 - 12:08 pm: |
|
Br1078lum
are these the jar lid removers you are using on lenses?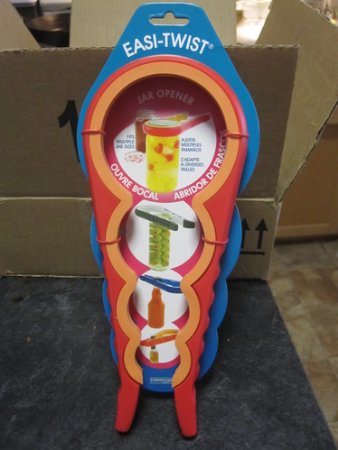 |
Br1078lum
Tinkerer
Username: Br1078lum
Post Number: 457
Registered: 11-2010
Rating: N/A
Votes: 0 (Vote!) | | Posted on Thursday, January 10, 2013 - 08:25 pm: |
|
One and the same, only a different color.
PF |
|