| Author |
Message |
    
Bernhard_prins
Tinkerer
Username: Bernhard_prins
Post Number: 1
Registered: 01-2009
Rating: N/A
Votes: 0 (Vote!) | | Posted on Thursday, January 08, 2009 - 12:58 pm: | 


|
Last week I bought a Canonet 19 RF with a stuck copal svx shutter I opened the front of the lens and removed the lens plate & attached lens from the camerahouse.
I already removed glass and several units, but I cannot figure out how to seperate the lens from the plate. --I think the problem is in the bottom part of the lens just behind this mounting plate-- Could somebody help me to solve this problem so I can go on disassembling...?
thanks,
Bernhard Prins
Holland |
Harryrag
Tinkerer
Username: Harryrag
Post Number: 34
Registered: 05-2008
Rating: N/A
Votes: 0 (Vote!) | | Posted on Friday, January 09, 2009 - 06:20 am: |
|
Had the same problem a while ago, also the aperture blades were stuck, they are moved by a relatively weak spring, so if you expect them to work properly they have to be faultlessly clean.
I found it not necessary to remove the shutter unit from the plate. Reassembling everything is a good bit more complicated with a Canonet than, say, a Konica Auto S2 that uses the same shutter.
The rear lens group is accessible after removing the plate from the body, which you have done already according to your description. If you take off the black rectangle metal light shield, it is almost as easy to screw out the rear lens group via unscrewing the outer two-notched ring nut than removing the front lens part. Canon lenses are sometimes very tightly screwed in, so one has to be careful not to slip and scratch the glass or goof up the notches. Both the shutter and aperture blades can now be accessed from both sides and carefully cleaned. Also the shutter can be cocked and released in that state.
When open in "B" the aperture blades can separately wiped from both sides.
I cannot recommend to flood the shutter, not even after separating it from the front plate.
If you want to separate the shutter from the plate you have to unscrew the retainer nut around the collar carrying the rear lens half. This requires a special spanner or selfmade tool. |
Bernhard_prins
Tinkerer
Username: Bernhard_prins
Post Number: 2
Registered: 01-2009
Rating: N/A
Votes: 0 (Vote!) | | Posted on Saturday, January 10, 2009 - 11:07 pm: |
|
Hello Harry,
thanks for your comment.
It's still difficult for me to separate the lens & plate. The shutter lever is very loose, no friction whatsoever.
So I have to take a look what's wrong underneath the distance ring.
Can you tell me which part of the lens can be taken out as seen in these pictures? I drew some arrows, maybe you can comment these spots As far as I can see there are no more screws to remove...
thanks,
Bernhard
  |
Harryrag
Tinkerer
Username: Harryrag
Post Number: 36
Registered: 05-2008
Rating: N/A
Votes: 0 (Vote!) | | Posted on Sunday, January 11, 2009 - 04:01 am: |
|
Hi, Bernhard, the end - not the arrow head - of your red arrow points right to where the blackened burnished steel retainer nut is, it has two notches for the above mentioned spanner tool. This ring nut keeps the shutter/lens barrel in its place.
Your first picture shows you unnecessarily removed the guide rails for keeping the helicoil straight, if it unscrews it is not so easy to put it back. Don't make matters worse. A complete knockdown of these parts is usually only done to regrease the thread.
Please note, before you unscrew the whole assembly, the lever always seems inoperative if the shutter is already cocked! If this is the case with yours, it does not make sense to disassemble everything. Instead, try to release the shutter with the lever on the left (photo 1) after putting a drop or two of lighter fluid on the blades. Wait a second, then tick the shutter blades, that's the set of blades closer to the front of the lens barrel, with a toothpick while pushing the release lever. If the shutter is cocked, the blades should open now. Repeat that procedure if the blades are still stuck. If this does not work, which I think is not very probable, your problem is more serious and a knockdown as you had planned it seems more reasonable. |
Bernhard_prins
Tinkerer
Username: Bernhard_prins
Post Number: 3
Registered: 01-2009
Rating: N/A
Votes: 0 (Vote!) | | Posted on Friday, January 16, 2009 - 01:10 pm: |
|
Hi Harry, it took me some evenings to make this thing work...again &again the blades opened and got stuck after a few times, I used lighter fluid and cellulosis thinner to make them go but finally I opened the retainer nut (very tight!) and took out almost all components (speedunit, timer, levers, springs) to come to the blades as close as possible. After flushing the whole shutter house several times (I didn't remove the shutter cock unit) , reassembled and greased several components I took a dozen pictures to help me to reassy... So now it is Friday night and my Canonet is working again,a bit hesitating; at least 8 times out of 10 it fires properly and 2 times still a bit sticky, but it's getting better every minute. Thank you for your kind reply and advice, this really was a good lesson for me to see how a Copal shutter works.
Bernhard Prins |
Harryrag
Tinkerer
Username: Harryrag
Post Number: 37
Registered: 05-2008
Rating: N/A
Votes: 0 (Vote!) | | Posted on Saturday, January 17, 2009 - 02:48 am: |
|
That is good news. On a number of cameras however, the stickiness returns, because flushing may mean you soften and only partly wash out all the grime that the mechanism has gathered. Oily goo often creeps and settles elsewhere inside the housing. That is why I usually wait a number of days, sometimes weeks, before reassembling. And there are cases in which a complete taking apart of the blade set is inevitable, for instance when previous "repairers" put in oil. Then cleaning each blade individually is a must.
I hope this does not apply to your project, and all the best for your tinkering experience to come, J. |
Bernhard_prins
Tinkerer
Username: Bernhard_prins
Post Number: 4
Registered: 01-2009
Rating: N/A
Votes: 0 (Vote!) | | Posted on Friday, January 23, 2009 - 08:39 am: |
|
I believe you are right....I have to clean each blade and one of the blades got stuck, maybe twisted, during repeatedly firing now....so I'm considering complete disassembling now and maybe I'll be able to repair the jammed blade... Even if the camera has gone lost, it still is an interesting enterprise.
Bernhard Prins |
Harryrag
Tinkerer
Username: Harryrag
Post Number: 41
Registered: 05-2008
Rating: N/A
Votes: 0 (Vote!) | | Posted on Friday, January 23, 2009 - 11:03 am: |
|
If you go all the way you will have to dismantle everything to the bones.
Reinstalling shutter or aperture blades after cleaning can be a very frustrating event. I have done that several times with Copal, Citizen and Seiko shutters, following the excellent repair advice here http://pheugo.com/cameras/index.php?page=copalmxv. Those shutters still work well, but getting them together again after cleaning was close to the limit of my tinkering abilities.
Whenever it seems reasonable I try an alternative method before ripping everythiung apart to get the blades clean, and that is by wetting them with electronic contact cleaner first. I then let it soak in overnight and repeatedly swab the blades with lighter fluid until they are without any residue. This is a boring job and may cost you a whole afternoon, but it is inevitable. When the shutter is open on "B" you can insert a toothpick, let the blades close again and carefully pry the blades open and wipe them clean where they overlap. This saves time, but one has to make sure not to warp the blades.
On the two Canonets 19 I own the blades looked clean when I got them, but in fact turned out to be among the dirtiest of all my rangefinders. |
Bernhard_prins
Tinkerer
Username: Bernhard_prins
Post Number: 5
Registered: 01-2009
Rating: N/A
Votes: 0 (Vote!) | | Posted on Monday, January 26, 2009 - 12:25 pm: |
|
Finally I succeeded in opening the shutter halves,looking for several jammed shutter blades, there was one damaged. I carefully grinded and polished the sheetmetal blade part until it was smooth again..
I followed instructions and pictures on your recommended site, but had some trouble to re-order them in the original setting.There was a really good piece of advice: 5 shutter blades; 4 spacers under and the 5th one on top of the rearmost!
But cw or ccw? After trying out all possible positions I found out how. So reassy looked like hell, but fortunately I carefully built in the arranged shutter setting to the bottom plate opposing the aperture blades and it fitted at once...and it worked again.After reassy the rest, having trouble with replacing a few tiny springs I reassed the camera again after several hours of intensive labor.... it sounds very vivid, no more sticky dirt.So I hope it will remain as it is now, although I learned a lot of this operation.
Greetings and thank you again for your good advice,
Bernhard Prins |
Harryrag
Tinkerer
Username: Harryrag
Post Number: 43
Registered: 05-2008
Rating: N/A
Votes: 0 (Vote!) | | Posted on Tuesday, January 27, 2009 - 02:47 am: |
|
Congratulations!
The Canonets are rated as not so easy cameras, and as a whole they are in fact as demanding as the first Hi-Matics or the Fujica V2. What you say about the right order of spacers and blades appears to me like a d�j� vu of an early tinkering experience with a Konica Auto S2 that uses the same shutter as the (old) Canonet 19 with only minor differences around the cam disc.
Maybe you have also been bitten by the bug by now and more tinkering projects are waiting ahead, J. |
Bernhard_prins
Tinkerer
Username: Bernhard_prins
Post Number: 6
Registered: 01-2009
Rating: N/A
Votes: 0 (Vote!) | | Posted on Tuesday, January 27, 2009 - 09:17 am: |
|
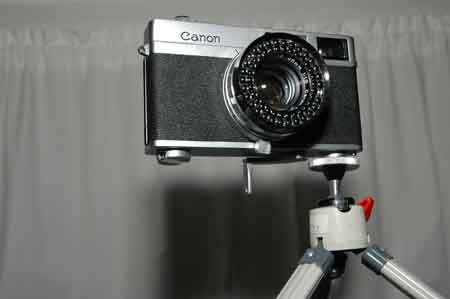
So here he is!
My next project will be my Zorki 1 which has an irritating light leak, a transparent white ghost-like stain in the middle of almost every picture.
The Z 1 with its collapsible Industar 22 (Elmar clone 3,5/ 5cm) performes amazingly sharp pictures so I think its time to open this one now and have a look inside.....
greetings,
Bernhard Prins
 |
|