| Author |
Message |
    
Jeffk
Tinkerer
Username: Jeffk
Post Number: 53
Registered: 10-2011
Rating: N/A
Votes: 0 (Vote!) | | Posted on Saturday, December 31, 2011 - 01:15 pm: | 


|
My old Zeiss Ikon Nixe 122 rollfilm camera recently became orphaned when the last supplier that I am aware of (Central Camera in Chicago) told me that it was unable to obtain more stock, so I was faced with a choice: Fabricate a sheet-film back for the camera, since an original 9x14 film back appears to be exceedingly rare, or convert the camera to 120. I decided to do the latter - if I ever find an original sheet film back, I can explore that option, but meanwhile I can use the camera if want to and live with the ~ 6.5x13.5 cm format. This should give me 4 shots per 120 roll, without unrolling it in a dark room and marking the backing paper to match the 122 frame separation.
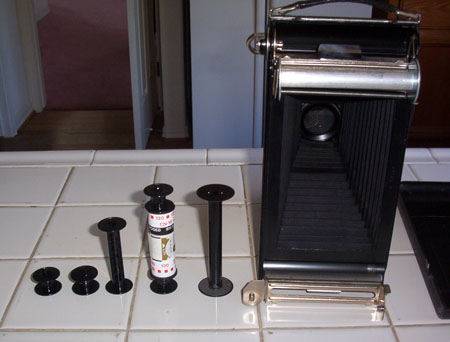
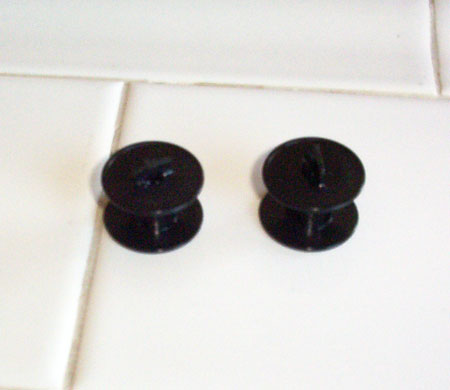
Photos below show how I did this. I bought five used plastic 120 spools on ebay, and cut four of them down to 15 mm height using a saw, a Dremel sanding/cutting wheel, some sandpaper, and Testors plastic model cement. Using the leftover bits of plastic, I then made four rectangular bits to glue into one end of each mini-spool, to catch the standard 120 spool ends. The glue bonds are very strong, I attempted to break one by twisting but was unable to do so despite applying far more torque than it will ever see in use inside the camera.
Seems to work fine! The image from the lens will of course over-fill the film width, but I do not see how this will harm anything since the unused light will fall onto the black metal backing plate of the camera. And maybe best of all, I now can run any film that is made in 120 format, rather than being limited to one black-and-white negative film in 122 format.
 |
Denverdad
Tinkerer
Username: Denverdad
Post Number: 13
Registered: 05-2011
Rating: N/A
Votes: 0 (Vote!) | | Posted on Sunday, January 01, 2012 - 11:10 pm: |
|
Nice conversion! I am very interested in this, as I have often contemplated purchasing an old 122 or 125 rollfilm folder specifically for the purpose of converting it to 120 film and achieving the resulting panoramic format. I just need to find the right folder, especially one having a decent lens!
But do you have the numbers right on the resulting frame dimensions - wouldn't the width still be around the 55-56mm you typically get with 120 film (when you exclude the rebate area)? If so, the final aspect ratio should be more like 2.5:1 - a rather nice aspect ratio in my opinion - resulting in up to 5 exposures per roll. Well, my notes are based on the dimensions of old Kodak folders, so it is possible I am missing something that is different with the old Zeiss folders.
Jeff |
Jeffk
Tinkerer
Username: Jeffk
Post Number: 54
Registered: 10-2011
Rating: N/A
Votes: 0 (Vote!) | | Posted on Monday, January 02, 2012 - 01:43 am: |
|
Jeff, 65 mm is about the 120 spool width - the image will overfill the film, so I'm not sure yet exactly what the useful width will be. On this camera, the opening at the back in front of the film plane is about 135 mm in length, so the final aspect will be something bigger than 2:1.
I think I could get 5 exposures per roll with this, but I would have to unroll and remark the backing paper to know when to stop advancing the film, since this camera just has a knob and a little window covered by red film. That sounds like a hassle, so I should safely get 4 just by using every other "frame". If you or anyone has a sketch of how exactly 120 film rolls are organized (total length, leader length to first frame, etc.), that would be helpful, otherwise I will sacrifice an unused roll and see before I run film in the camera.
I think Kodak 122 folders have the same format, but I don't know for sure since I do not have one. |
Denverdad
Tinkerer
Username: Denverdad
Post Number: 14
Registered: 05-2011
Rating: N/A
Votes: 0 (Vote!) | | Posted on Monday, January 02, 2012 - 03:08 pm: |
|
If it helps, I have a 120 roll that I use for loading tests and other purposes, and measuring just now I see that the actual width of the film is 61.0mm - slightly narrower than the paper backing. But the rebate markings - writing and symbols along the edges of the film - set the usable width to something less than that (assuming you don't want to include the writing in your images, that is). Checking a couple developed 120 strips that I have lying around... Ektar 100 shows about 57mm between the markings, while a strip of Acros 100 has a bit more - about 59.5mm. Interestingly, the reason the Fuji film has more room is that it has markings only along one edge, instead of both. Of course, if you intend to support the film on both edges, then the effective width will be reduced.
I also measured the total length of my test roll - 825mm. Theoretically, that should provide sufficient room for 5 exposures each 135mm long. But then again, I appreciate what you are saying about staying with 4 exposures - that seems the most straightforward route to go without having to calibrate exact starting point on the roll, numbers of turns for each exposure, etc.
In any event, I look forward to working out all these little details myself, if and when I ever take on a panoramic project like this.  |
Jeffk
Tinkerer
Username: Jeffk
Post Number: 55
Registered: 10-2011
Rating: N/A
Votes: 0 (Vote!) | | Posted on Monday, January 02, 2012 - 08:58 pm: |
|
Thanks, sounds like it'll be closer to 60x135. Interestingly the one time I ran 122 film in this camera, the local photo shop could not deal with the full-frame enlarging problem, so I scanned the negative at very high resolution and had them give me a photo print. The limitation here was my scanner, so the final print was 12x24, about the same format I'll get with 120 film instead of 122 - the negative is wider, but I could not scan the full width. It's a nice format for panorama-style landscapes, which is what I will use this camera for anyways - setup is kinda lengthy and I can't change focus accurately after I set it with a ground glass before loading the roll, so landscapes at infinity are simplest to deal with. |
Jeffk
Tinkerer
Username: Jeffk
Post Number: 62
Registered: 10-2011
Rating: N/A
Votes: 0 (Vote!) | | Posted on Wednesday, March 28, 2012 - 09:37 pm: |
|
Works! This is basically the full frame format.
Note, I came across one final hurdle because I had not appreciated that if the 120 film is centered on the rollers, the red frame counter window is off the film backing paper and there is no way to know when to stop advancing the film after exposures. The solution was to stack both mini-spool spacers on the same side to push the film towards the red window - this camera has view camera-type translation stages up front, so I simply moved the lens over by almost the same amount to compensate.
 |
Finnegan
Tinkerer
Username: Finnegan
Post Number: 135
Registered: 09-2009
Rating: N/A
Votes: 0 (Vote!) | | Posted on Thursday, March 29, 2012 - 10:56 am: |
|
Just get a GreenLee punch and cut a hole where you need it. Install a new red window. Then cover up the old red window with the metal/leather from the new hole. |
|