| Author |
Message |
    
Fanfaron
Tinkerer
Username: Fanfaron
Post Number: 1
Registered: 06-2010
Rating: N/A
Votes: 0 (Vote!) | | Posted on Saturday, June 19, 2010 - 10:32 pm: | 


|
Hi I wish to know where I should start. I'm a beginner, never overhaul a lens before.
I want to access the moving group of the lens.
I read some article on this site and it says we should always start by the front of the lens. I also see that people are talking about the spanner tools. Is it with a spanner that I'm able to remove the front element?
I don't have a decent tool, I'm planning to buy these, is it good?
http://cgi.ebay.com/ws/eBayISAPI.dll?ViewItem&item=160417348394&ssPageName=STRK:MEWAX:IT
http://cgi.ebay.com/ws/eBayISAPI.dll?ViewItem&item=360192434889&ssPageName=STRK:MEWAX:IT
Is this enough?
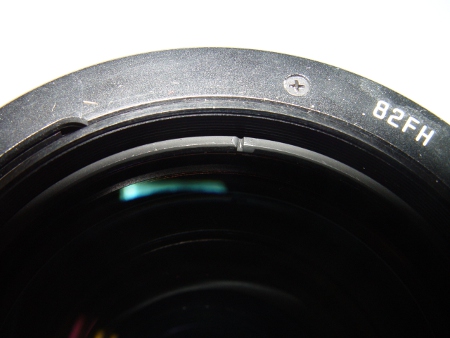
I included a picture of the front element. As you can see, there's no nameplate on the front element, just two little slot to fit the spanner I guess.
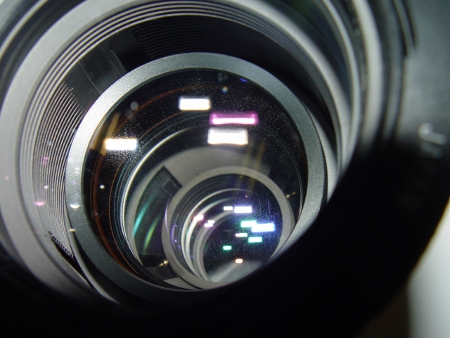
And I try to picture the fungus.
Thank you
  |
    
Johnnyh
Tinkerer
Username: Johnnyh
Post Number: 14
Registered: 06-2009
Rating: N/A
Votes: 0 (Vote!) | | Posted on Sunday, June 20, 2010 - 04:16 am: | 


|
Hi Fanfaron,
I can't give you any advice about this sort of lens, but if you tell us what is the Make and Model, somebody may be able to give you suitable help. |
    
Der_uli
Tinkerer
Username: Der_uli
Post Number: 11
Registered: 05-2010
Rating: N/A
Votes: 0 (Vote!) | | Posted on Sunday, June 20, 2010 - 07:08 am: | 


|
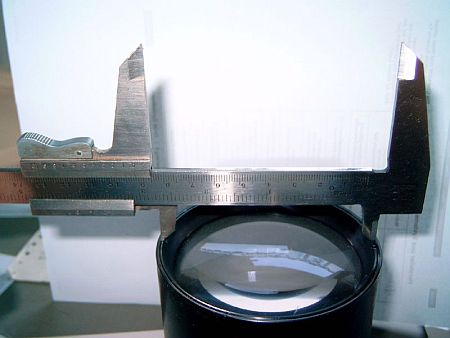
82FH reminds me of the sunshade of a big Tamron zoom ... but I couldn't find it at the adaptall-2.org site. Anyway, the spanner wrench from the first link is expensive. Instead, I always use an old caliper, plus some drops of isopropyl (cleaner) alcohol on the threads if it doesn't come loose easily.

-uli |
    
Mareklew
Tinkerer
Username: Mareklew
Post Number: 107
Registered: 03-2010
Rating: N/A
Votes: 0 (Vote!) | | Posted on Sunday, June 20, 2010 - 07:14 am: | 


|
Fanfaron,
not trying to discourage you from the start, but this seems to be a (relatively modern) zoom lens. I would not encourage you to start with such.
While 'traditional' lenses are built up by stacking a set of rings, glass elements etc, all of which are machined to tight tolerances, modern lenses gave up tight mechanical tolerance in favor of post-assembly adjustment. While you can disassemble, say, Jupiter 8 and put it back together and be done, as soon as you remove some elements from an AF zoom you are likely into a long session of adjustments you most likely don't have tools for.
Marek |
    
Fanfaron
Tinkerer
Username: Fanfaron
Post Number: 2
Registered: 06-2010
Rating: N/A
Votes: 0 (Vote!) | | Posted on Sunday, June 20, 2010 - 08:49 am: | 


|
It's the tamron SP 80-200mm f2.8 adaptall. I have to do it because it's getting worst. sending to professional is too expensive for me. A store here, montreal, wants 200$ to do the cleaning and he's not even sure that will work.
Anyway I want to learn how to do it.
somebody knows what I should do? |
    
Fanfaron
Tinkerer
Username: Fanfaron
Post Number: 3
Registered: 06-2010
Rating: N/A
Votes: 0 (Vote!) | | Posted on Sunday, June 20, 2010 - 08:58 am: | 


|
Der_uli: it's this one
http://adaptall-2.org/lenses/30A.html
it takes 77mm filter so it's kinda big.
Mareklew: It's a push pull manual focus lens. It's modern I guess but not modern like a Nikon 70-200mm f2.8 vr II. But you are right I'm very scare. But I have no choice. It's all over the glass. If I need only to remove the front element to access it then it's not that bad. But very scare. Because we think that we can make things better, we usually worsting it. |
    
Glenn
Tinkerer
Username: Glenn
Post Number: 788
Registered: 07-2006
Rating: N/A
Votes: 0 (Vote!) | | Posted on Sunday, June 20, 2010 - 01:49 pm: | 


|
Lung Chan,
My comments on the Canon 100/200 zoom posted below apply to your lens also - you will find that ALL the internal surfaces of the lens will be contaminated with spores, so just cleaning the glass is a waste of time medium to long term.
I strongly advise you not to do a DIY job on this lens, it is not a simple job. However all may not be lost, are you absolutely sure that it is fungus and not just dirt on the the internal glass surfaces? As I said in the Canon thread, this type of lens 'pumps' an awfully large volume of contaminated air through the interior and over the years the amount of dust deposited becomes very obvious. If it is just dust you may as well leave well alone - unless you again completely clean out the interior of the lens the dust will soon reappear on the glass.
Re the comments by the Montreal repairman - any proper clean with remove the fungus spores from the interior and prevent further damage - he should do a proper job for $200, but I have had people cover themselves by saying it may not work for two reasons. !/ They only clean the glass and do not decontaminate the internal surfaces. 2/ The fungus may have etched the lens coatings and the marks will still be visible after cleaning.
If you are still determined to DIY this lens, try and obtain the factory adjustment procedures for this range of lenses -if available on the internet they will certainly help you set the lens up again |
    
Fanfaron
Tinkerer
Username: Fanfaron
Post Number: 4
Registered: 06-2010
Rating: N/A
Votes: 0 (Vote!) | | Posted on Sunday, June 20, 2010 - 06:58 pm: | 


|
Hi glenn,
pretty sure it's not dust, the repairman says fungus, And I have lens that have dust, and it's not like dust. It's trace on the glass, like someone clean the glass and left some trace. You when you clean a window with water and leave some trace.
I know fungus will come back. but if it easy to clean, I can just remove the front ring and clean it. How was your cleaning going?
I read that a mixte of peroxyde of hydrogen + ammonia is doing a great job agains that. |
    
Juliard1
Tinkerer
Username: Juliard1
Post Number: 3
Registered: 04-2008
Rating: N/A
Votes: 0 (Vote!) | | Posted on Tuesday, June 22, 2010 - 04:44 am: | 


|
Hi Glen, First of all; get the right tools. Japanes lenses use JIS headed screws and normal philps pointed screwdrivers damage the screws. Micro Tools sell these. Next; be careful in buying lens spanners, some of them don't work properly. I made my own and it works 100% Go for it and don't let others discourage you. Just work carefully and methodically and take photos as you go. |
    
Glenn
Tinkerer
Username: Glenn
Post Number: 789
Registered: 07-2006
Rating: N/A
Votes: 0 (Vote!) | | Posted on Tuesday, June 22, 2010 - 08:11 am: | 


|
This Tamron lens uses 16 elements in 12 groups in its optical construction and apart from a slight corner softness at f2.8, it is a superb low light optic - even by today's standards. Bugger the internal alignment up and you might as well stick an empty milk bottle on your camera! Over the years I have come across three examples of this lens - ex eBay, which were absolute dogs and all had obvious signs of DIY. Their new owners sought my help for the SIMPLE!! adjustment needed, but having previously seen some of the factory set up data I declined the privilege and booted them of my doorstep.
By all means make careful notes and photograph every stage; but always be aware that you just may destroy the one property that makes this lens special, allowing it to stand out from the rest of the mediocre rubbish of that period. |
    
Fanfaron
Tinkerer
Username: Fanfaron
Post Number: 5
Registered: 06-2010
Rating: N/A
Votes: 0 (Vote!) | | Posted on Tuesday, June 22, 2010 - 07:34 pm: | 


|
Hi glenn, If it's just dust I would leave alone, but it's fungus man. Maybe just sell it on ebay like you said. |
    
Fanfaron
Tinkerer
Username: Fanfaron
Post Number: 6
Registered: 06-2010
Rating: N/A
Votes: 0 (Vote!) | | Posted on Tuesday, June 22, 2010 - 07:36 pm: | 


|
Juliard1: how do you make your own spanner?
for sure if I going to do the job, I will get the right tools before doing it.
How much can I get with a lens with fungus? I'm not even sure someone will buy it. |
    
Jayd
Tinkerer
Username: Jayd
Post Number: 71
Registered: 06-2007
Rating: N/A
Votes: 0 (Vote!) | | Posted on Wednesday, June 23, 2010 - 06:33 pm: | 


|
While I have not had a Zoom completely striped cleaned and reassembled I have had a couple repaired by a Pro repair guy in central Ohio and the cost was far less than $200.00 so if you really like the lens I would seek some other quotes on repair, if not put it up on Ebay you never know what something will sell for, and you can set a reserve price. The other thing is do a complete items search on Ebay and see what they are selling for you may be able to buy another for less than cost of repair and get some Ideal of what yours will sell for.
Jay |
    
Juliard1
Tinkerer
Username: Juliard1
Post Number: 6
Registered: 04-2008
Rating: N/A
Votes: 0 (Vote!) | | Posted on Saturday, June 26, 2010 - 04:25 am: | 


|
Hi Fanfaron,
If you want to make your own lens spanner, I can send you photos and drawings. Just send me your email address. My email is [email protected].
Best Regards,
Derek Pollard. |
    
Fanfaron
Tinkerer
Username: Fanfaron
Post Number: 7
Registered: 06-2010
Rating: N/A
Votes: 0 (Vote!) | | Posted on Monday, June 28, 2010 - 12:04 am: | 


|
my email is [email protected]
Thank you |
    
Fanfaron
Tinkerer
Username: Fanfaron
Post Number: 8
Registered: 06-2010
Rating: N/A
Votes: 0 (Vote!) | | Posted on Sunday, July 04, 2010 - 10:41 pm: | 


|
Hi juliard I try to send you a email but your server has rejected my mail. |
    
Contaxfan
Tinkerer
Username: Contaxfan
Post Number: 1
Registered: 07-2010
Rating: N/A
Votes: 0 (Vote!) | | Posted on Thursday, July 22, 2010 - 05:46 am: | 


|
For this kind of zooms which using the front group of optics for focusing you need not to remove the front elements.
Here is the procedure for 30A
1. Remove the rubber grip on focusing ring
2. Zoom the lens to 200mm and infinity to set the reference point
3. Using marker to mark the position of all rings and the front portion of the lens related to the marking line (you can draw a line from end to end along the lens).
4. Remove all tapes which are used to stick two rings together on focusing ring. Please make sure you do use the marker to mark the position of these rings.
5. you will find two screws which are used to guide the focusing group (aka the front portion of the lens).
6. remove these two screws
7. Place you lens in vertical position
8. turn the focusing group in anticlockwise "SLOWLY". It will separate with lens body within a turn. And don't put this portion out when you find the "point of separation".
9. Using marker to mark the point where the separation point is. Later you need to put back the lens at the same position.
10. Then you can separate the front portion of the lens!!!
11. after cleaning, just turn the front group back to the lens body at the point where it comes out.
12. Try using 95% alcohol to clean the lens surface. Then using water steam to clean the residues. You also can use peroxide mixed with wetting agent ammonia to kill the fungus on the lens first then by alcohol then by steam.
In my opinion it is no way to remove the fungus spores from all lens surfaces. The reason is that our air is full of spores. If someone told you he can remove all the spore from the lens, he is telling lie. Once the lens came out from the clean room in factory the fungus spores will get into the lens when you use it. To kill the remain fungus in the lens you can use the UV lamp (UVa) or simply under the sun. You also can kill the fungus by fungicide but it is not easy to get them in open market. Most of them are sold to libraries and labs. The best way to prevent the fungus infection is to keep the lens dry and use them regularly. |